A memorable AI video needs more than a recognizable face. It needs a clear idea, readable movement, and a moment that gives viewers a reason to keep watching. For short-form creators, two formats offer very different ways to achieve that: an emotional zombie story and a lively party performance.
Reeldo AI provides template-based workflows for both. The zombie format builds a dramatic sequence around two characters and a memory transition. The Burning Bridges format places a lead character into a party scene, where gestures and crowd atmosphere carry the clip.
Choosing between them starts with your creative goal. Here is how the formats differ, what photos to prepare, and what to check before sharing the result.
Two AI Video Formats, Two Different Creative Goals
These formats share a photo-based starting point, but they ask viewers to respond in different ways.
The zombie story relies on emotional contrast. A threatening encounter becomes a moment of recognition, followed by an embrace and a warmer memory. The appeal comes from the relationship between the characters, rather than horror alone.
The party format is performance-driven. The lead character enters a social scene, interacts with the camera, and moves through recognizable gestures. Personality, timing, and background activity matter more than a dramatic plot.
Here is a practical comparison of the options currently listed on Reeldo AI:
| Format | Photo Requirements | Creative Focus | Length Options |
| Zombie story | Two reference photos | Emotional storytelling and a memory transition | 15 seconds, plus a 24-second reunion template |
| Burning Bridges party clip | One lead photo; up to five optional background photos | Performance, gestures, and crowd atmosphere | 15 or 29 seconds |
Choose the zombie format when the relationship is the story. Choose the party format when the character’s presence and performance are the main attraction. Available settings may change, so confirm them in the generator before creating.
How to Make a Zombie AI Video with an Emotional Payoff
The strongest zombie clips make the relationship understandable before the final transition. Viewers should recognize that the survivor is facing someone important, not simply a random monster.
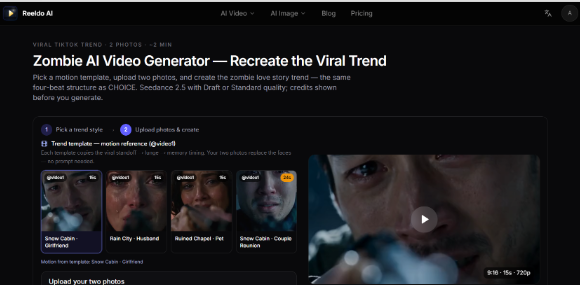
Reeldo AI’s Zombie AI Video tool uses two reference photos and a motion template to build a sequence around confrontation, recognition, an embrace, and a warm memory. One photo represents the survivor; the other represents the character who becomes a zombie.
Prepare the Two Roles Clearly
Use separate reference photos rather than a couple selfie. A clear, front-facing image with even lighting gives the system a less ambiguous reference than a dark photograph, a heavily filtered portrait, or a group shot.
Check the role assignments before generating. Reversing the photos can change who appears as the survivor and who transforms, altering the intended story.
For a pet-focused version, choose the dedicated pet template and a clear photograph of one animal. Avoid images where several pets overlap or the face is partly hidden.
Match the Setting to the Mood
The available templates include snow-cabin, rainy-city, ruined-chapel pet, and extended reunion variations. Think about how the setting supports the emotional contrast.
A cold cabin can make the later warm memory feel more intimate. A rainy street creates a visual contrast with a brighter flashback. A pet version shifts the focus toward companionship.
The template supplies the narrative structure, so a complicated prompt is not necessary for the standard workflow. Your main decisions are the reference photos, role assignments, template, and output settings.
Inspect the Transition, Not Just the Faces
A convincing opening does not guarantee a convincing ending. Review whether the characters remain identifiable during movement and whether the embrace connects naturally to the memory scene.
Look for distorted hands, sudden changes in clothing, or faces that drift away from the references. The transition is the emotional payoff; if it feels confusing, the story loses much of its impact.
How to Create a Burning Bridges AI Party Clip
A party performance has a different challenge: the lead character must remain recognizable while the camera, gestures, and crowd create movement.
Reeldo AI’s Burning Bridges AI tool uses a lead photo to place your likeness into a party scene. You can also add up to five optional background photos to personalize additional cast members.
Start with a Strong Lead Photo
The page recommends a clear head-to-waist portrait with even lighting and no sunglasses. This is a useful starting point because the format involves upper-body movement, not just a stationary face.
Choose a photograph with an unobstructed face. Avoid strong shadows, extreme angles, and objects covering the body. For optional background references, use one person per photo and check their assigned order in the interface.
Photo quality helps establish a clearer reference, but it does not guarantee perfect likeness throughout the generated clip.
Choose the Preset Before Judging the Wardrobe
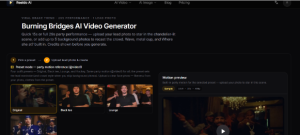
The listed presets are Original, Black tee, Lounge, and Hockey. The reference photo supplies the lead’s likeness, while the selected preset determines the wardrobe.
This distinction matters. Uploading a portrait in one outfit does not mean the generated character will retain those clothes. Choose the preset that fits the intended mood, whether that is a classic party look, a casual appearance, or a sports-themed gathering.
Keep the initial test simple. Adding several background people immediately creates more identities and interactions to inspect.
Use Quick and Full for Different Purposes
The 15-second Quick option covers the entrance, wave, and cup action. The 29-second Full option includes the longer performance sequence.
Quick is useful for checking whether the lead photo and preset work together before committing to a longer result. Full makes more sense when the complete performance is essential to the idea.
Longer is not automatically better. Choose the duration that supports the clip rather than adding seconds simply because they are available.
A Practical Workflow Before You Generate and Share
Both formats benefit from the same discipline: decide what the clip should communicate, test the essentials, and inspect the result before publishing.
Plan the Output First
Start with the destination. Reeldo AI lists both vertical 9:16 and horizontal 16:9 options. Vertical framing usually suits full-screen short-form viewing, while horizontal framing may fit a landscape video or presentation.
Choose the ratio before generating where possible. Cropping afterward can remove hands, background characters, or an important part of the action.
Then select the template, upload your references, and review the displayed credit requirement. Current draft and standard options offer different resolutions and credit costs. A draft is useful for evaluating the concept; a higher-resolution output is worth considering only after the composition works.
A higher quality setting should not be treated as a guaranteed fix for identity or motion problems.
Check Quality and Permissions
Before sharing, review:
- Identity: Do the characters remain recognizable throughout?
- Motion: Are gestures, hands, and physical interactions coherent?
- Continuity: Do clothing and background details change unexpectedly?
- Framing: Are important actions visible on a phone screen?
- Permissions: Are you authorized to use the photos, reference media, and any added audio?
Consent and media rights are separate from technical quality. Use your own images or obtain permission from the people depicted. Access to a template does not automatically grant rights to a song, original music video, or someone else’s likeness.
Follow the destination platform’s synthetic-media disclosure rules. For zombie clips, also consider whether weapon imagery or frightening scenes are appropriate for the audience.
Frequently Asked Questions
Do I need one photo or two?
The zombie workflow requires two reference photos with different character roles. The party workflow requires one lead photo, with up to five optional background photos. Start with the required inputs and add complexity only when it serves the idea.
Should I generate a short draft first?
A short draft is a practical way to evaluate framing, identity, and motion before spending more credits. For the party format, the Quick option tests the opening performance, but it does not show every action included in the Full version.
What makes an AI trend video worth sharing?
A clear concept, readable action, and a coherent result matter more than length alone. Use the zombie format for an emotional turn and the party format for a performance-led clip. Treat the template as a starting point, then let careful selection and review shape the final video